A roof can look sound from the ground while hiding cracked concrete, rotten framing, ponding water, loose tiles, or weakened metal sheets. By checking structure, remaining roof life, mounting risks, drainage, shade, access, and contract responsibilities, you can decide whether to install now, repair first, or reject an unsuitable design.
Key takeaways
- Inspect the roof slab, rafters, attic, and past leak damage before installation.
- Confirm the roof can carry the array, rails, ballast, and maintenance loads.
- Reserve clear roof area around edges, vents, drains, and access paths.
- Require waterproofing, worker safety, drawings, and mounting details in writing.
Is the Roof Strong and Sound Enough for Solar?
A solar array should not cover a defective roof. During a roof inspection, check the roof slab or rafters from above and below, because attic access can expose rot, mold, delamination, undersized framing, and old leak damage hidden beneath an intact surface.
- Look for visible cracks in concrete, spalling, rust stains, sagging, and exposed reinforcement.
- Press suspect decking for soft or springy areas.
- Check loose or broken tiles and corrosion at metal panels.
- Find membrane splits, loose seams, exposed underlayment, and punctures.
- Trace active leaks, damp insulation, staining, and mold in the attic.
- Inspect ponding water, blocked drains, valleys, and parapets after rainfall.
Panels, rails, fasteners, cable trays, ballast, and maintenance loads add weight. Wind uplift, snow load, roof span, array position, and attachment forces can create the larger risk. Have a structural engineer assess an older, cracked, lightweight, or modified roof instead of relying on a visual check.
| Roof surface | Mounting concern | Check before approval |
|---|---|---|
| Reinforced-concrete slab | Anchors or ballast can affect waterproofing and slab strength | Confirm reinforcement, cracks, and anchor locations |
| Corrugated metal sheets | Fasteners can tear sheets or leak | Verify purlins and compatible brackets |
| Standing-seam metal | Clamps must fit the seam | Avoid unnecessary penetrations |
| Clay tiles | Broken tiles can cause leaks | Use tile-compatible hooks and replacement tiles |
| Asbestos-cement sheets | Drilling releases hazardous fibres | Obtain specialist advice before proceeding |
Compare remaining roof life with the array’s roughly 25–30-year service life. Reroof before installation when the roof is near replacement; later panel removal and refitting costs more and creates new leak risks. Review the roofing warranty for approved attachments, flashing, and contractors.
What Load and Mounting Method Will the Roof Need?
A panel’s published weight is only one part of the structural calculation. Add the solar dead load from modules, rails, clamps, fasteners, cable trays, ballast, and maintenance access, then assess the roof’s span, framing, deterioration, and remaining capacity.
Wind uplift and snow load depend on the site, roof height, exposure, edge and corner zones, snow drifting, array layout, and attachment spacing. Use the applicable structural code, such as IS 875 Part 3 in India, rather than a generic panel-weight rule. A structural engineer should review older, cracked, lightweight, or modified roofs.
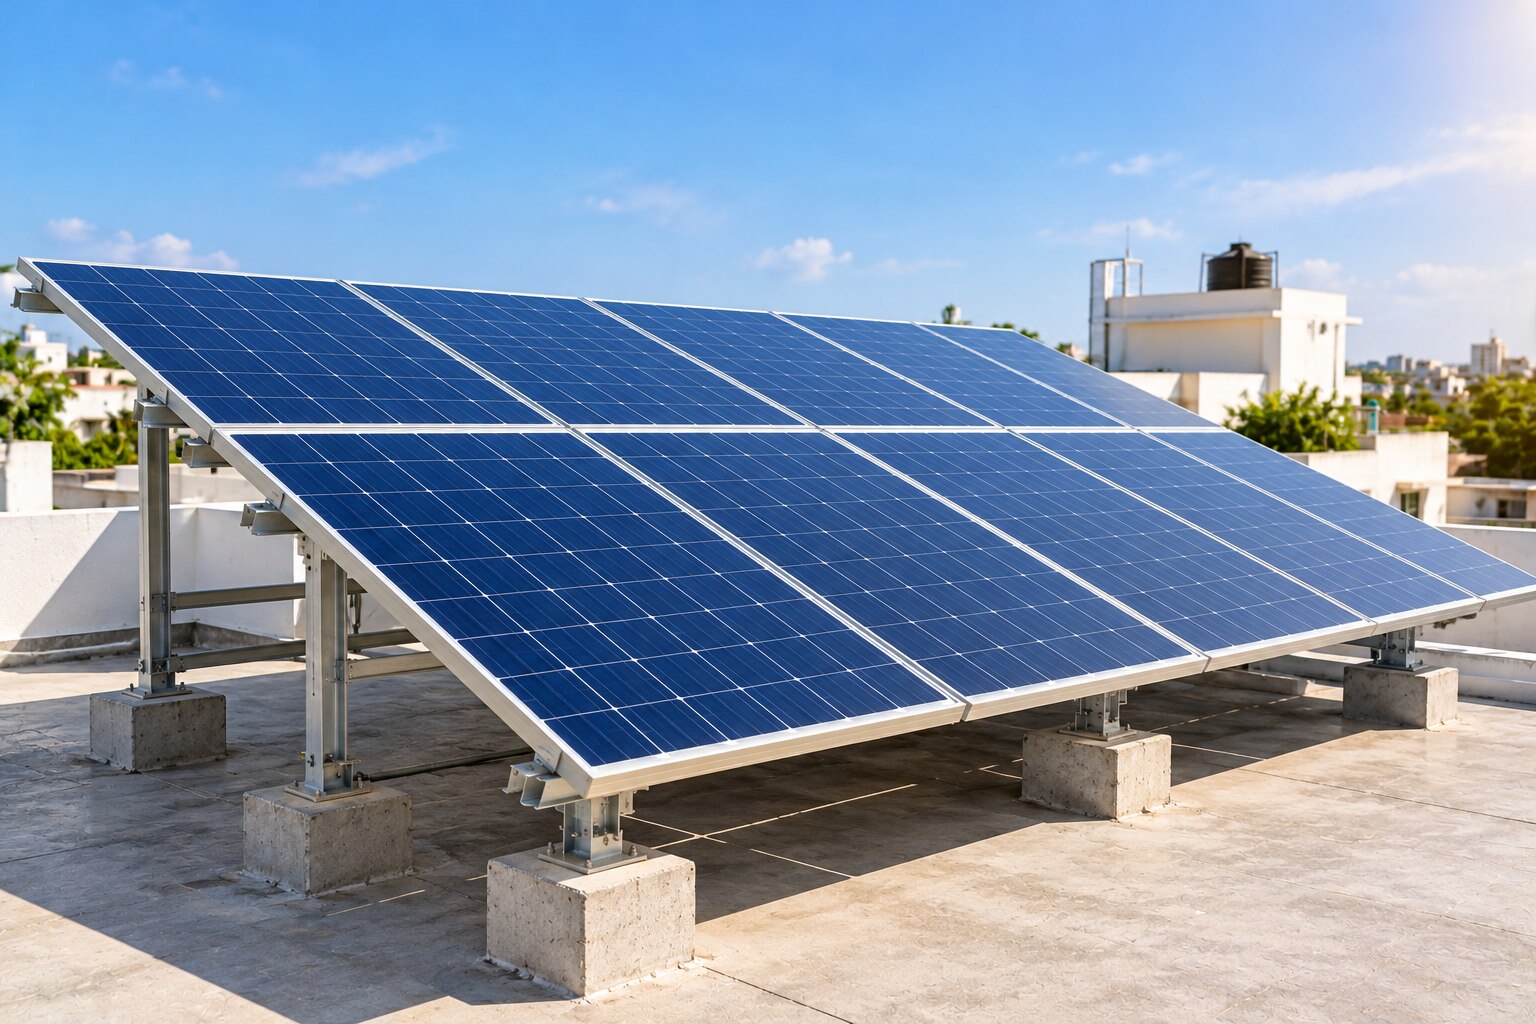
The mounting method must match the roof construction. A reinforced-concrete slab can accept engineered anchors or a verified ballast layout; ballast creates concentrated loads and must not block drains or scuppers. Standing-seam metal roofs use seam clamps, while corrugated sheets require attachment points designed for the purlins.
Clay tiles need flashed supports, membranes need approved penetrations or ballast protection, and asbestos-cement sheets require specialist handling rather than casual drilling.
Before approving the hardware, confirm:
- The engineer’s calculation includes solar dead load, wind uplift, snow load, and maintenance loads.
- Anchors connect to structural members, not just thin decking or brittle tiles.
- Ballast weight, pad locations, drainage paths, drains, and overflow routes are documented.
- Flashings, clamps, and sealants match the roof manufacturer’s warranty conditions.
- The installer identifies every damaged or corroded fixing that must be replaced.
How Much Roof Area Will Actually Work?
A roof can fit many modules on paper and still offer little usable roof area. Count only surfaces that remain clear after excluding obstructions, edge clearances, drainage zones, and paths needed to inspect equipment or repair the roof.
1. Draw the roof to scale and record each plane’s dimensions, roof pitch, parapets, valleys, ridge vents, chimneys, plumbing vents, skylights, HVAC units, and cable routes. A steep pitch changes mounting hardware, working access, and energy yield; do not estimate from a photograph.
2. Record compass direction for every plane and model panel orientation separately. South-facing modules are not the only workable choice in the northern hemisphere: east-facing modules favour morning demand, while west-facing modules favour afternoon demand. Compare predicted annual output, not module count alone.
3. Require a shading analysis covering nearby trees, buildings, tanks, parapets, and roof equipment at different times of day and through the year. Partial shade on one module can reduce output across a string when the design lacks suitable optimisers or separate electrical tracking.
4. Keep clear walking and service routes to vents, drains, inverters, and mounting points. Filling every open rectangle with panels can block inspections, complicate reroofing, and force workers to step on modules.
Approve the layout only after the drawing shows module boundaries, access paths, drainage clearance, and predicted production for each roof plane. Check the roofing warranty for restrictions on attachment locations, flashing products, or approved installers before accepting the final arrangement.
How Will Installation Protect Drainage, Waterproofing, and Workers?
Resolve water, access, and permission issues before materials reach the roof. A solar array can hide leaks, block drains, and turn a simple repair into panel removal.
1. Trace roof drainage from every low point to its outlet. Keep drains, scuppers, gutters, and overflow paths clear of panels, rails, cables, and ballast; redesign a ballasted layout if it redirects water or creates ponding water.
2. Reject the roof until active leaks, soft decking, loose membrane seams, exposed underlayment, cracked sealants, and corrosion are repaired. Inspect the attic or roof deck for rot, mold, delamination, and old leak damage that the surface cannot show.
3. Obtain the roofing manufacturer’s approved attachment and flashing details. Every roof penetrations point needs a compatible flashing system integrated with the roof assembly; sealant over a lag bolt is not a substitute. Follow both roofing and racking manufacturers’ instructions.
4. Protect the waterproofing membrane with approved walk pads, protection layers, and repair procedures. Confirm that ballast will not crush the membrane and that maintenance routes remain open.
5. Put worker controls in the method statement: guarded roof edges, secure ladders, designated walkways, fragile-surface warnings, fall-arrest equipment, weather limits, and electrical isolation procedures.
6. Confirm who owns the roof and obtain written consent from the landlord, housing society, or building manager. Check required building, fire, heritage, and utility permissions, plus roof-access hours and responsibility for future repairs.
Record the roof warranty terms before signing. A solar installer’s workmanship warranty does not preserve a roofing warranty automatically.
What Must the Contract and Site Documents Confirm?
A signed pre-installation checklist should attach dated roof photographs, a roof plan, defect locations, repair records, the proposed panel layout, and the structural assessment. Record active leaks, soft decking, ponding, blocked drains, loose tiles, membrane damage, corrosion, and parapet defects, then state who will repair each item before mobilisation.
Compare installer quotes against the same documents and ask each bidder to identify:
- Panel, rail, cable-tray, fastener, and ballast quantities
- Attachment points, flashing products, waterproofing method, and drainage clearances
- Site-specific wind uplift, snow load, edge-zone forces, and maintenance access
- Scaffolding, electrical work, permits, testing, debris removal, and repair exclusions
- System capacity, expected handover documents, workmanship warranty, and response process
Ms365 Solar Solution, like any bidder, should price unresolved roof repairs separately rather than burying them inside a solar package.
| Quote detail | What to compare | Why it matters |
|---|---|---|
| Roof work | Included repairs, flashing, membrane work, exclusions | Prevents leak disputes after installation |
| Structural design | Roof span, array layout, wind, snow, ballast or attachment loads | A panel-weight estimate misses local forces |
| Equipment | Module, inverter, racking, fasteners, cable protection | Reveals substitutions and incomplete scope |
| Warranty | Roof manufacturer terms and installer workmanship coverage | Solar workmanship does not replace the roof warranty |
The contract must name the approved mounting method, equipment models, array location, repair standard, completion date, payment stages, warranty terms, and responsibility for future leaks. Review the roof warranty for approved attachment methods, flashing products, and contractors before signing; record written confirmation that the planned work preserves coverage.
Related products
 | Solar rooftop system Solar rooftop system in Nagpur View product → |
 | Solar Panel System Solar Panel System in Nagpur View product → |
Frequently asked questions
How can you tell whether a roof is strong enough for solar panels?
Inspect the roof slab or rafters from above and below, including attic spaces, for rot, mold, delamination, undersized framing, and old leak damage. The installation plan must account for the array, mounting system, ballast, wind forces, and maintenance loads.
What roof area is suitable for a solar rooftop system?
Measure the clear, usable roof area after excluding shaded sections, roof edges, vents, tanks, drains, skylights, access paths, and other obstructions. Keep enough space for installation, inspection, cleaning, and future roof maintenance.
How should solar mounting protect drainage and waterproofing?
Keep mounting points and panel layouts away from drains and drainage channels, preserve water flow, and specify how penetrations will be sealed. The plan should also provide safe worker access without damaging the roof surface.
What documents should you confirm before signing a solar installation contract?
Ask for the roof inspection findings, structural load assumptions, panel layout, mounting method, drainage and waterproofing details, worker-safety measures, and responsibilities for repairs or damage.
Related products
 | Residential solar power system Residential solar power system Residential solar power system in Nagpur View product → |
 | commercial power solar system commercial power solar system View product → |
 | Off grid solar system Off grid solar system in Nagpur View product → |
 | on grid solar system on grid solar system in Nagpur View product → |